登录AutoDL,租赁镜像
选择镜像: PyTorch / 2.1.0 / 3.10(ubuntu22.04) / cuda 12.1
机器开机后,设置学术加速 source /etc/network_turbo
进入工作目录 cd autodl-tmp/
拉取项目 git clone https://gitclone.com/github.com/fishaudio/fish-speech.git ; cd fish-speech
安装依赖 pip install -e.
如果报错,安装portaudio apt-get install portaudio19-dev -y
安装后执行 pip install torch==2.3.1 torchvision==0.18.1 torchaudio==2.3.1 --index-url https://download.pytorch.org/whl/cu121
下载模型 cd tools python download_models.py
下载完模型后运行接口 python -m tools.api_server --listen 0.0.0.0:6006
然后用浏览器去到aotodl实例页面 https://autodl.com/console/instance/list
如下图点击你刚才机器的自定义服务按钮,开启端口转发服务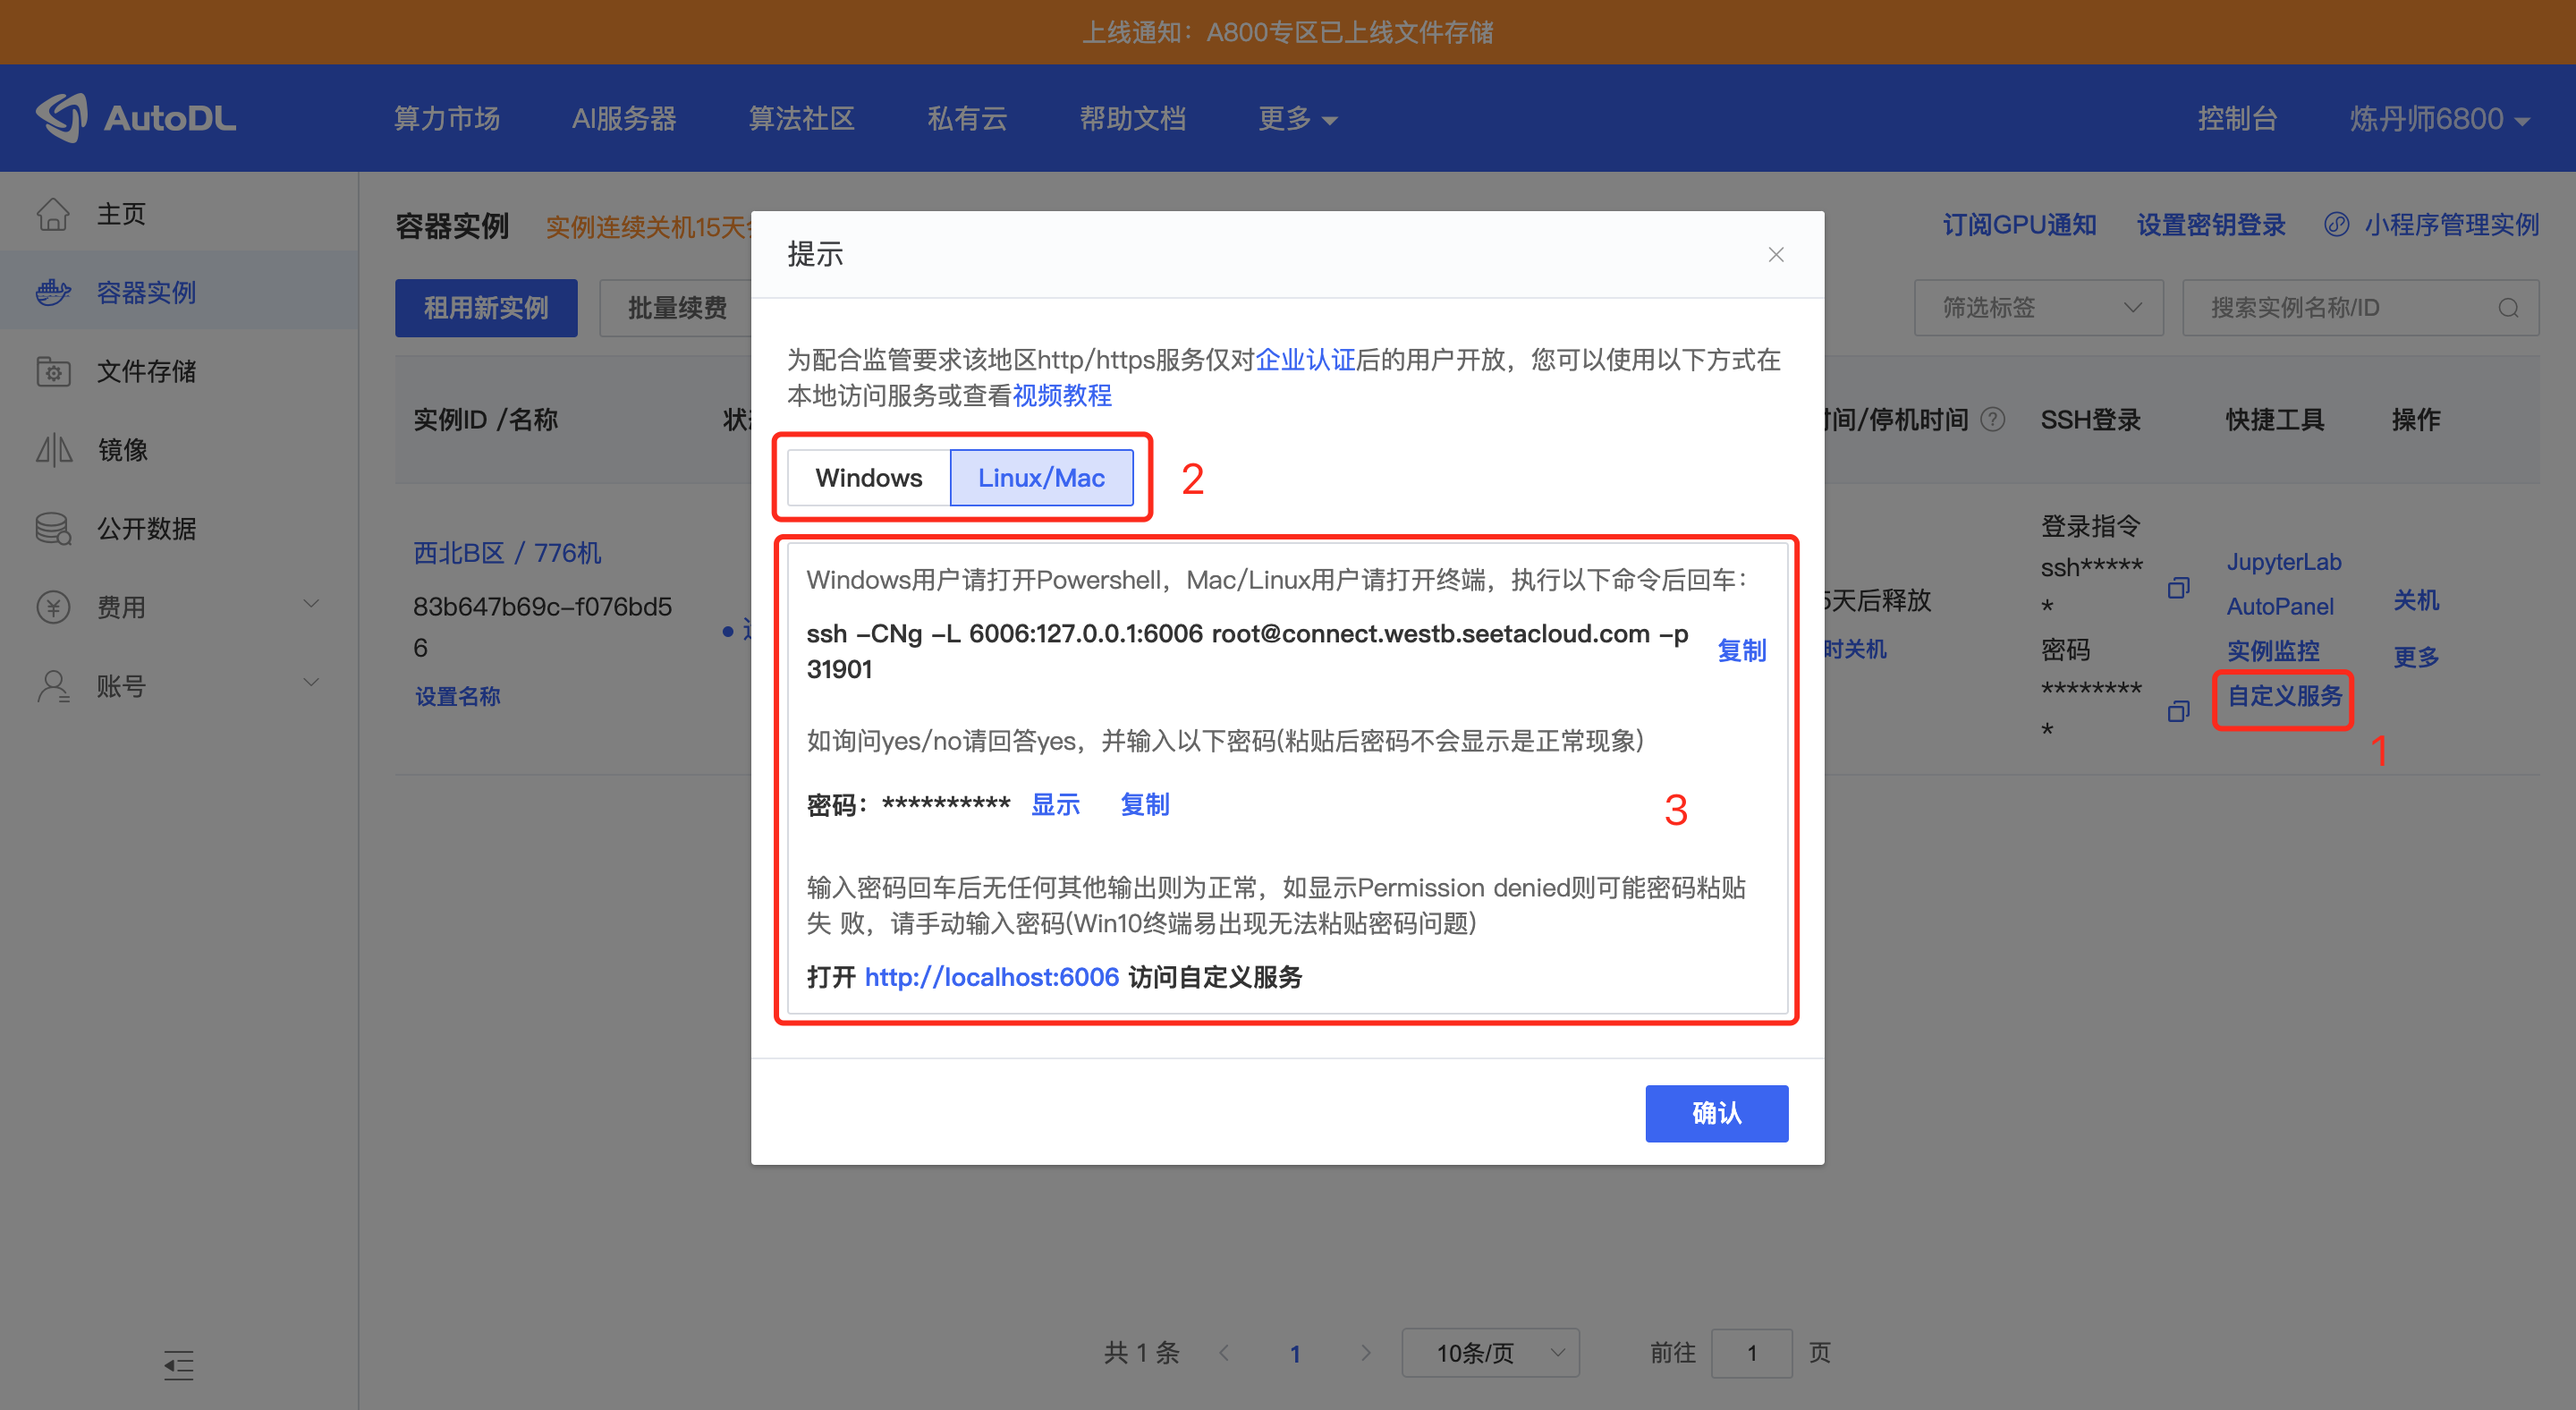
端口转发服务设置完成后,你本地电脑打开网址http://localhost:6006/,就可以访问fish-speech的接口了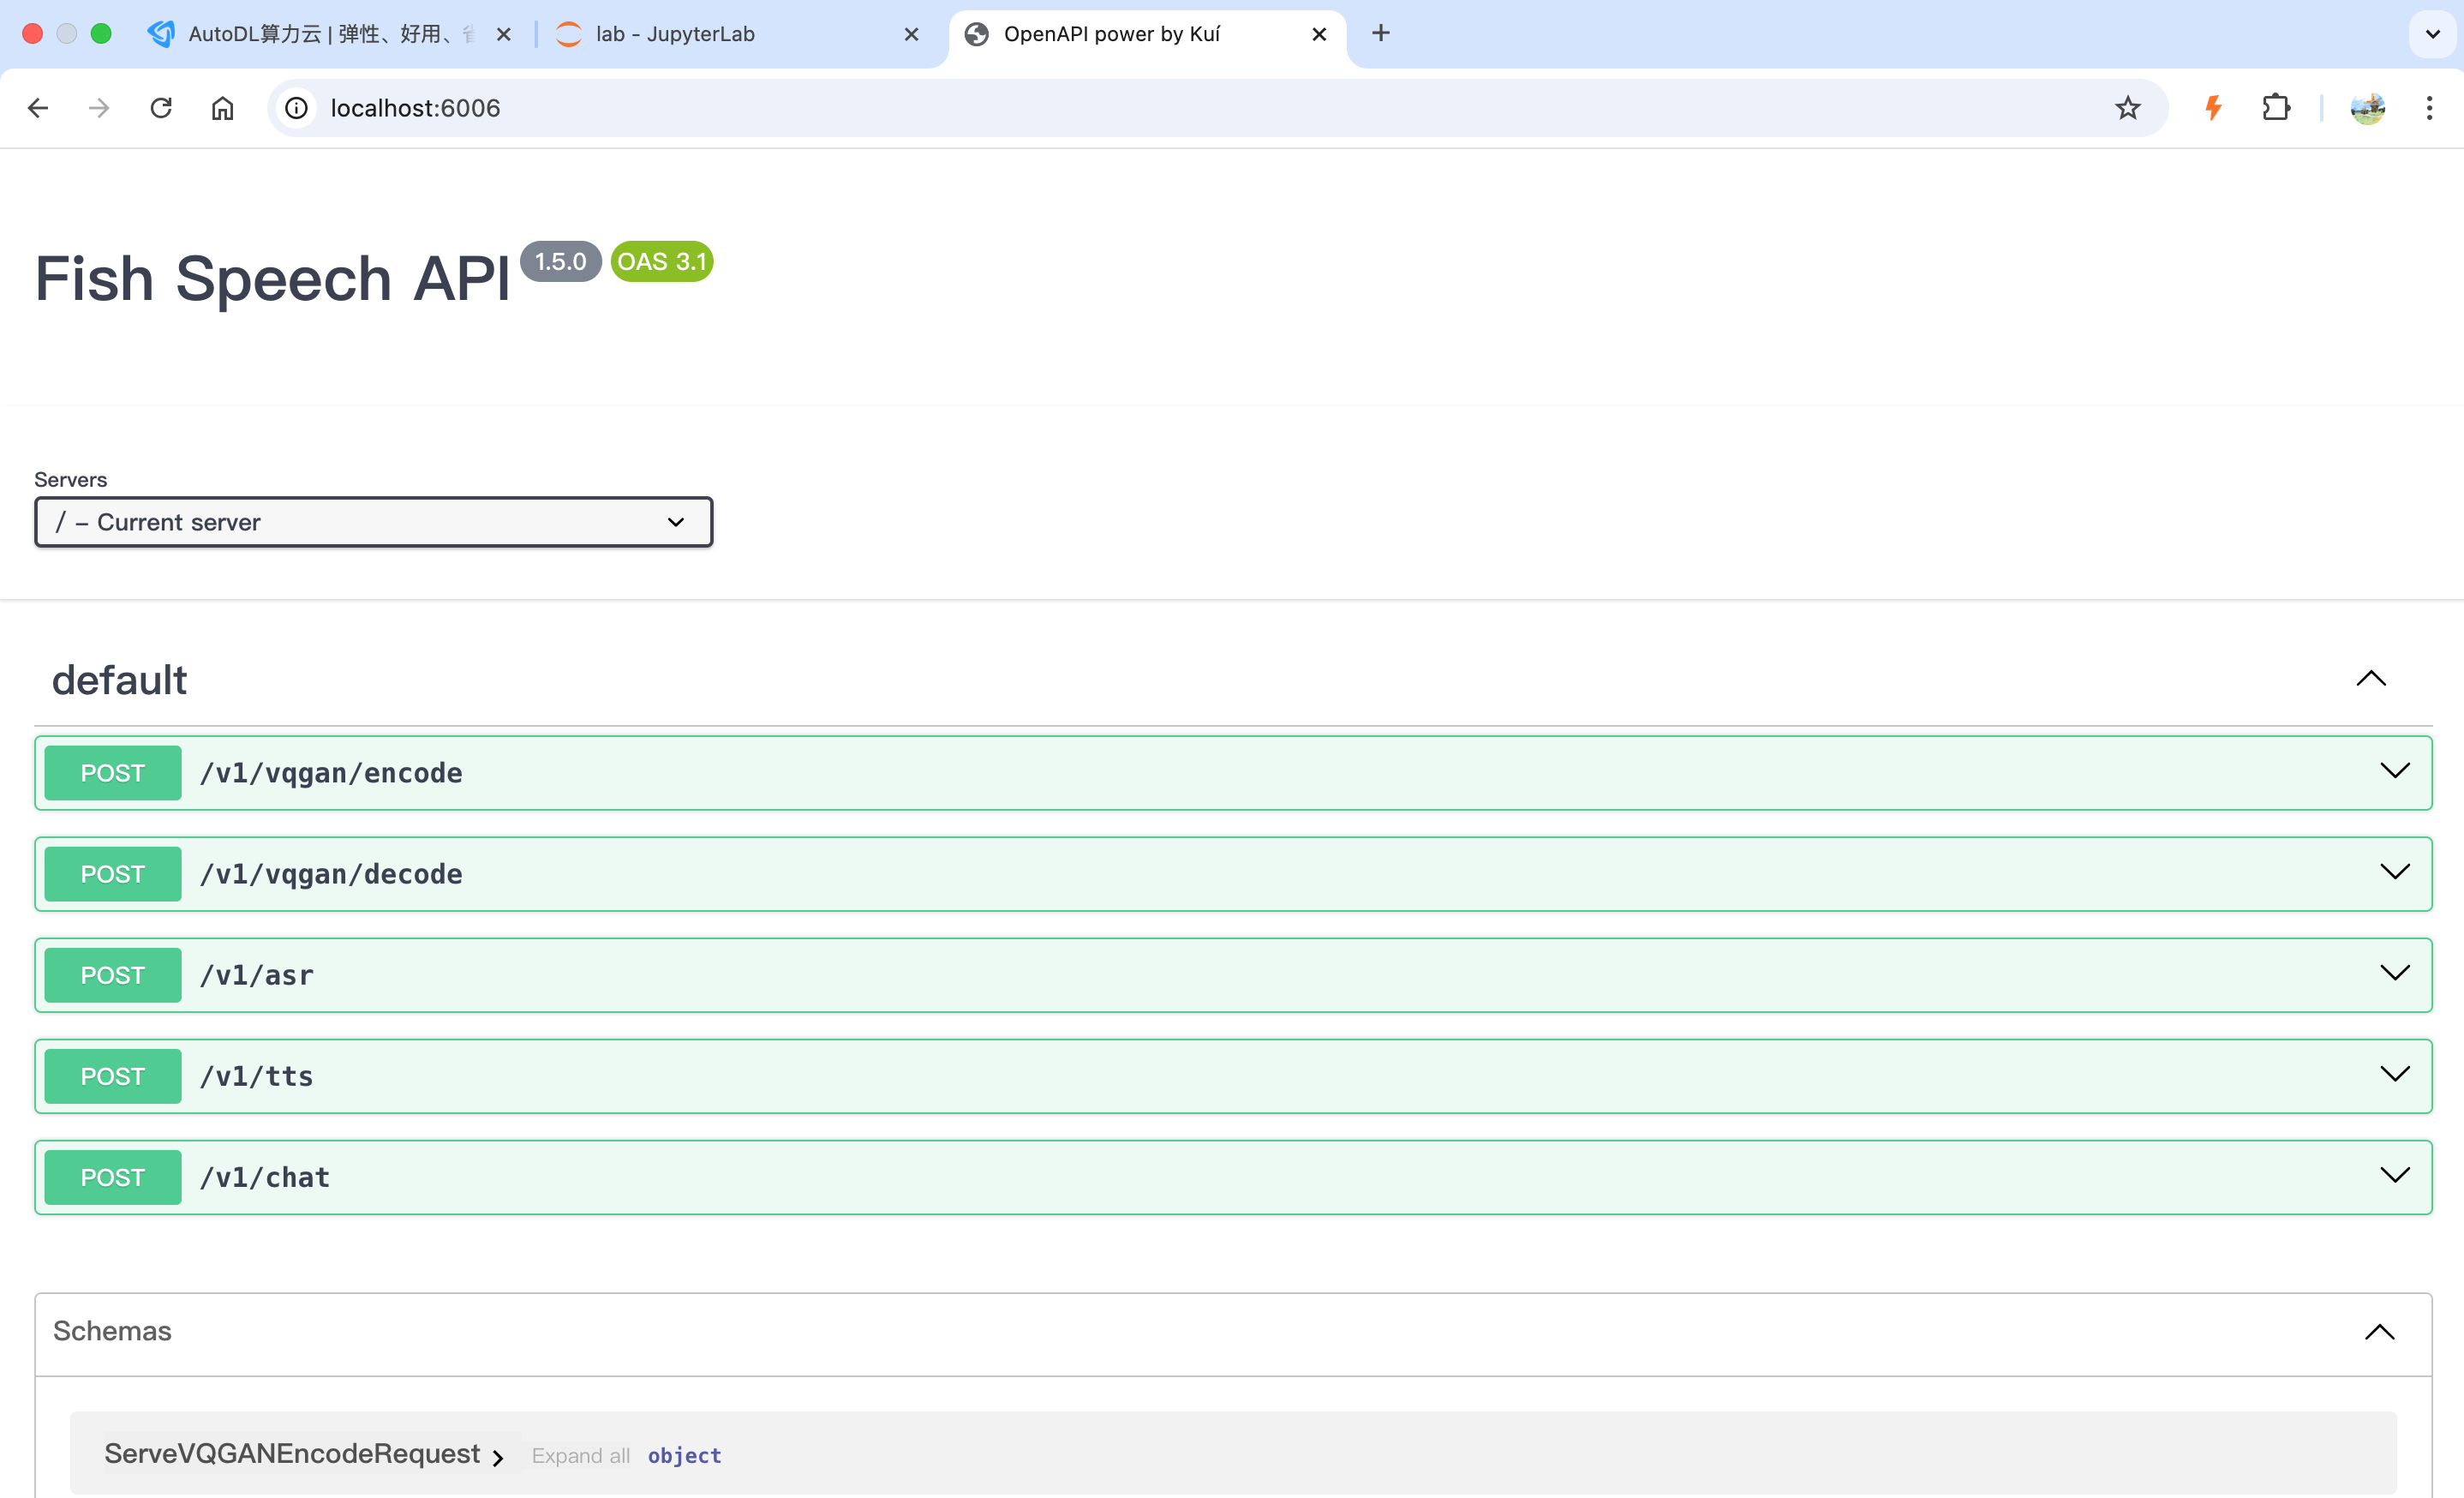
如果你是单模块部署,核心配置如下 selected_module: TTS: FishSpeech TTS: FishSpeech: reference_audio: ["config/assets/wakeup_words.wav",] reference_text: ["哈啰啊,我是小智啦,声音好听的台湾女孩一枚,超开心认识你耶,最近在忙啥,别忘了给我来点有趣的料哦,我超爱听八卦的啦",] api_key: "123" api_url: "http://127.0.0.1:6006/v1/tts"
然后重启服务